
mybb Support
Credits
Last updated on November 22, 2024
How to use Credits
- The Credits feature can be used in a variety of ways:
- refunds issued to student accounts
- scholarship funds
- fundraising proceeds
- Account Credits can be used to make purchases in the POS (Point of Sale) view in myShop.
Enabling the Account Credits feature
- The Account Credits feature is disabled by default, so you will have to enable this feature in your settings to use it.
- To enable the Credits feature, navigate to the 4-square icon in the top right corner of your dashboard.
- Select the Update School Settings tab.
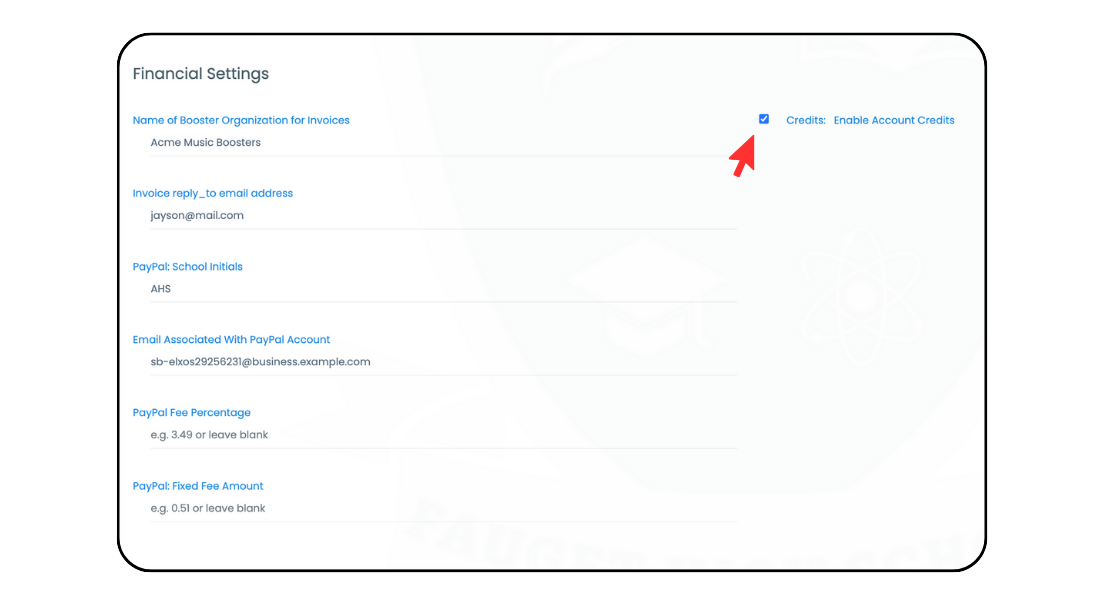
- Scroll down to Financial Settings and select the Credits: Enable Account Credits box (Image 1).
Elevated Access to the Credits feature
- All directors and admins have access to the Credits feature once it is enabled in School Settings.
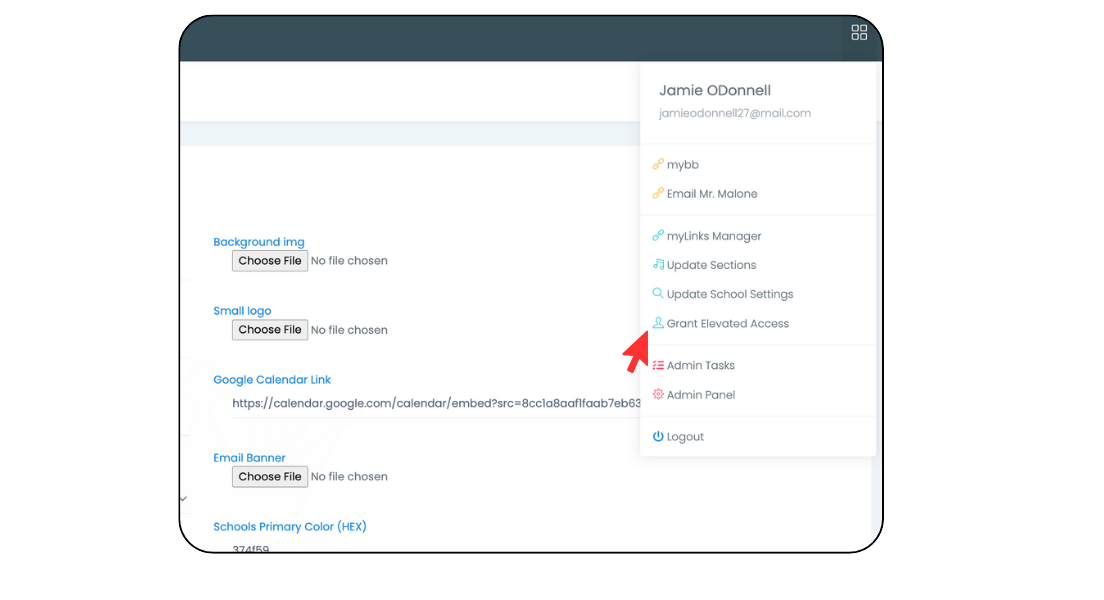
- To allow boosters, staff, or other relevant parties full access to the Credits feature, navigate to the 4-square icon in the top right corner of your dashboard.
- Select the Grant Elevated Access tab (Image 2). Learn more about Elevated Access here.
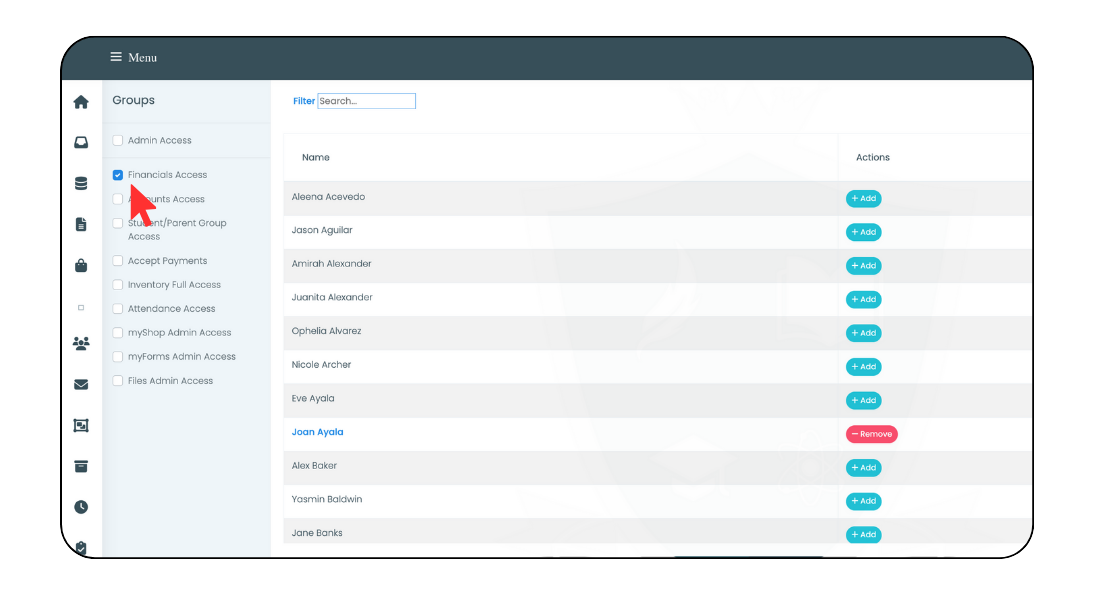
- Under Groups, select the Financials Access box (Image 3).
- Choose a person's name by scrolling or using the search bar and select the Add button to grant them access to all Financial features. To remove access, select the red Remove button.
Adding Credits to an Account
- From your dashboard, navigate to the Financials tab on the left side of your dashboard.
- Select the Account Credits tab.
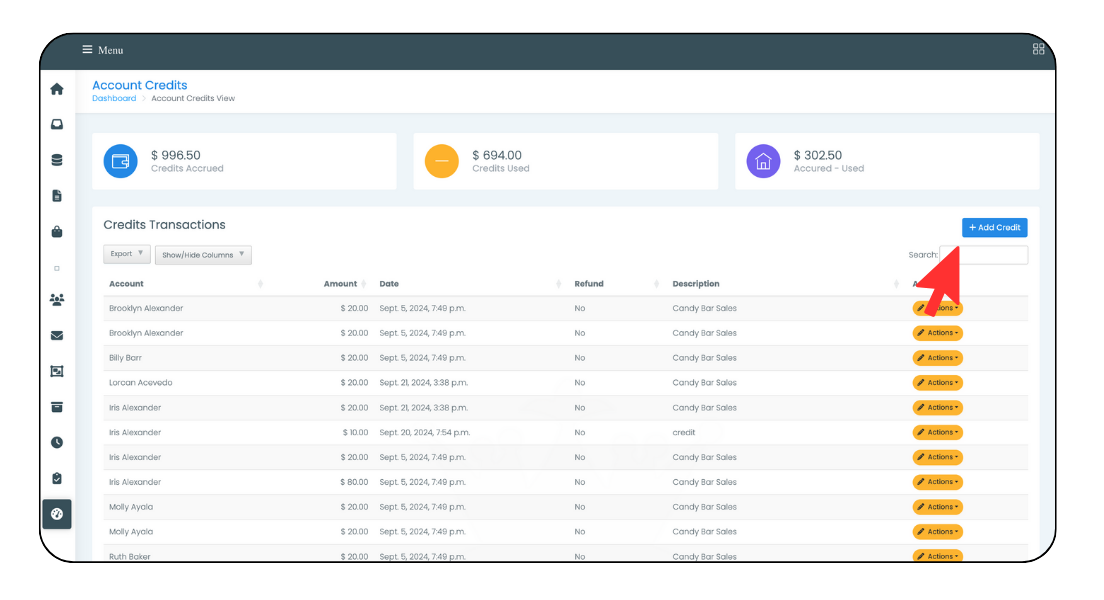
- Select the
Add Credit
button (Image 4).
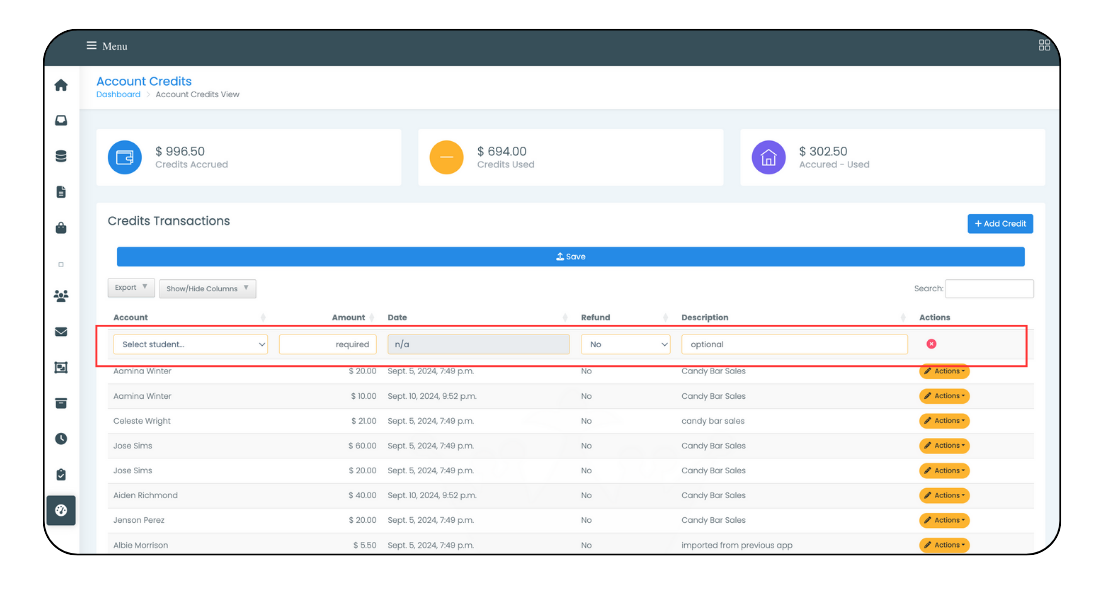
- A new row will populate at the top of the table (Image 5).
- Select the Student from the Account dropdown.
- Enter a credit Amount.
- Enter a Description, such as “candy bar sales”.
- If the credit is a refund, select Yes for refund. The default is No.
- Select the blue Save bar.
- You can add multiple rows at a time. However, you will not be able to save your progress unless all of the rows have a student selected and an amount entered. Select the red X to the far right of the row to remove it.
Apply credits to a fee
- Select the Financials tab on the left side of your dashboard.
- Select the Account Credits tab.
- Select Apply Credit
- A new row will be added to the Used Credits table (Image 6).
- Select the Student
- Enter an Amount
- Select a Fee
- If no fees appear, all of the fees are either paid or no fees were applied to the students account.
- Enter a description (Notes), such as “requested by parent”.

- Select the Save bar.
- You can add multiple rows at a time. However, you will not be able to save your progress unless all of the rows have a student selected and an amount entered. Select the red
X to the far right of the row to remove it.
Edit/Delete an Account Credit or Applied/Used Credit
- Financials tab > Account Credits
- Select Actions to the right of the credit you want to update.
- Select either Edit Amount, Edit Notes, or Delete Credit.
- For editing the credit, the field will have a yellow border indicating you can modify it.
- You can modify multiple rows before saving. Just make sure you select either of the Save buttons before leaving the page.
- You can save a blank Description field but you cannot save a blank Amount field. Enter 0.00 if you want to remove the amount.
Viewing Student Account Credits
- Select myAccount
- Both Credits and Used Credits are located under the Credits/Refunds tab.

- At this time, students or parents cannot apply their credits to a fee or myShop order.
- Applying credits towards fees is performed by a user with Admin Access or myShop Admin Access.
Exporting data
- To export Navigate to Financials > Account Credits
- Select the Show/Hide Columns dropdown.
- De-select Actions. This will remove the checkmark.
- Select the Export button
- Select your format
Other articles in this section
New Paragraph
