
mybb Support
Statements
Last updated on October 6, 2024
- Select the Financials tab on the left side of your dashboard.
- Select the Statements tab.
- When you select Statements from the Dashboard, two search bars populate.
- Select a student from the first dropdown. The student's Account Statement will populate (Image 1).
- You may use the search bar to filter by grade, name, or Student ID.
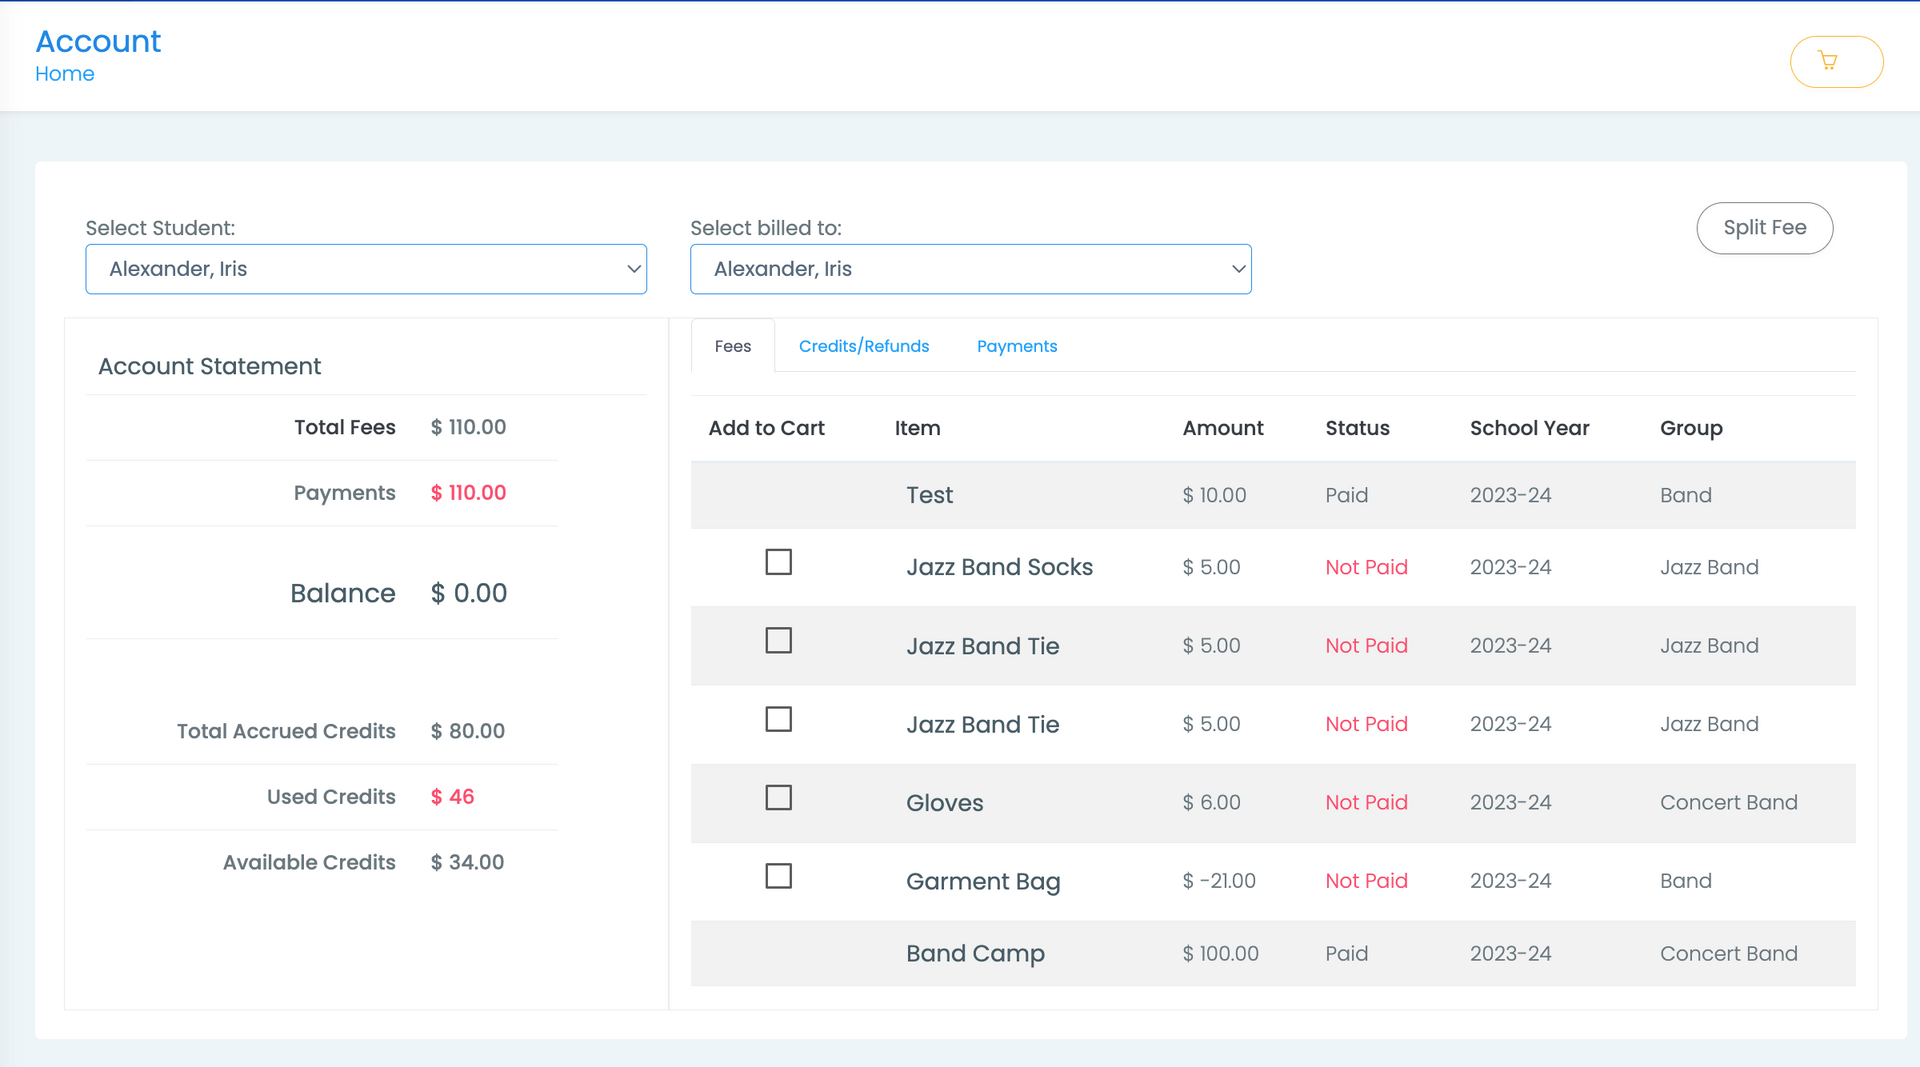
- In the Account Statement above, you can see the student's Total Fees, Payments, Current Balance, Total Accrued Credits, Used Credits, and Available Credits on the left side.
- On the right side you will see the dropdown "Select billed to". When accepting payment, select the person who made the payment from the dropdown. This will show up on the invoice.
- Below the billing dropdown, there are three tabs: Fees, Credits/Refunds, and Payments.
- Under the Fees tab, you can see all fees assigned to this student in this school year, the current status of the fee, and the group the fees are associated with.
- Under the Credits/Refunds tab, you will see all credits or refunds that have been added to the student's account and a separate table of all used/applied credits. Learn more about Credits here.
- The Payments tab will show you a list of paid fees and their corresponding invoices.
- You can click on the invoice number to generate a copy of the invoice.
Generating Invoices
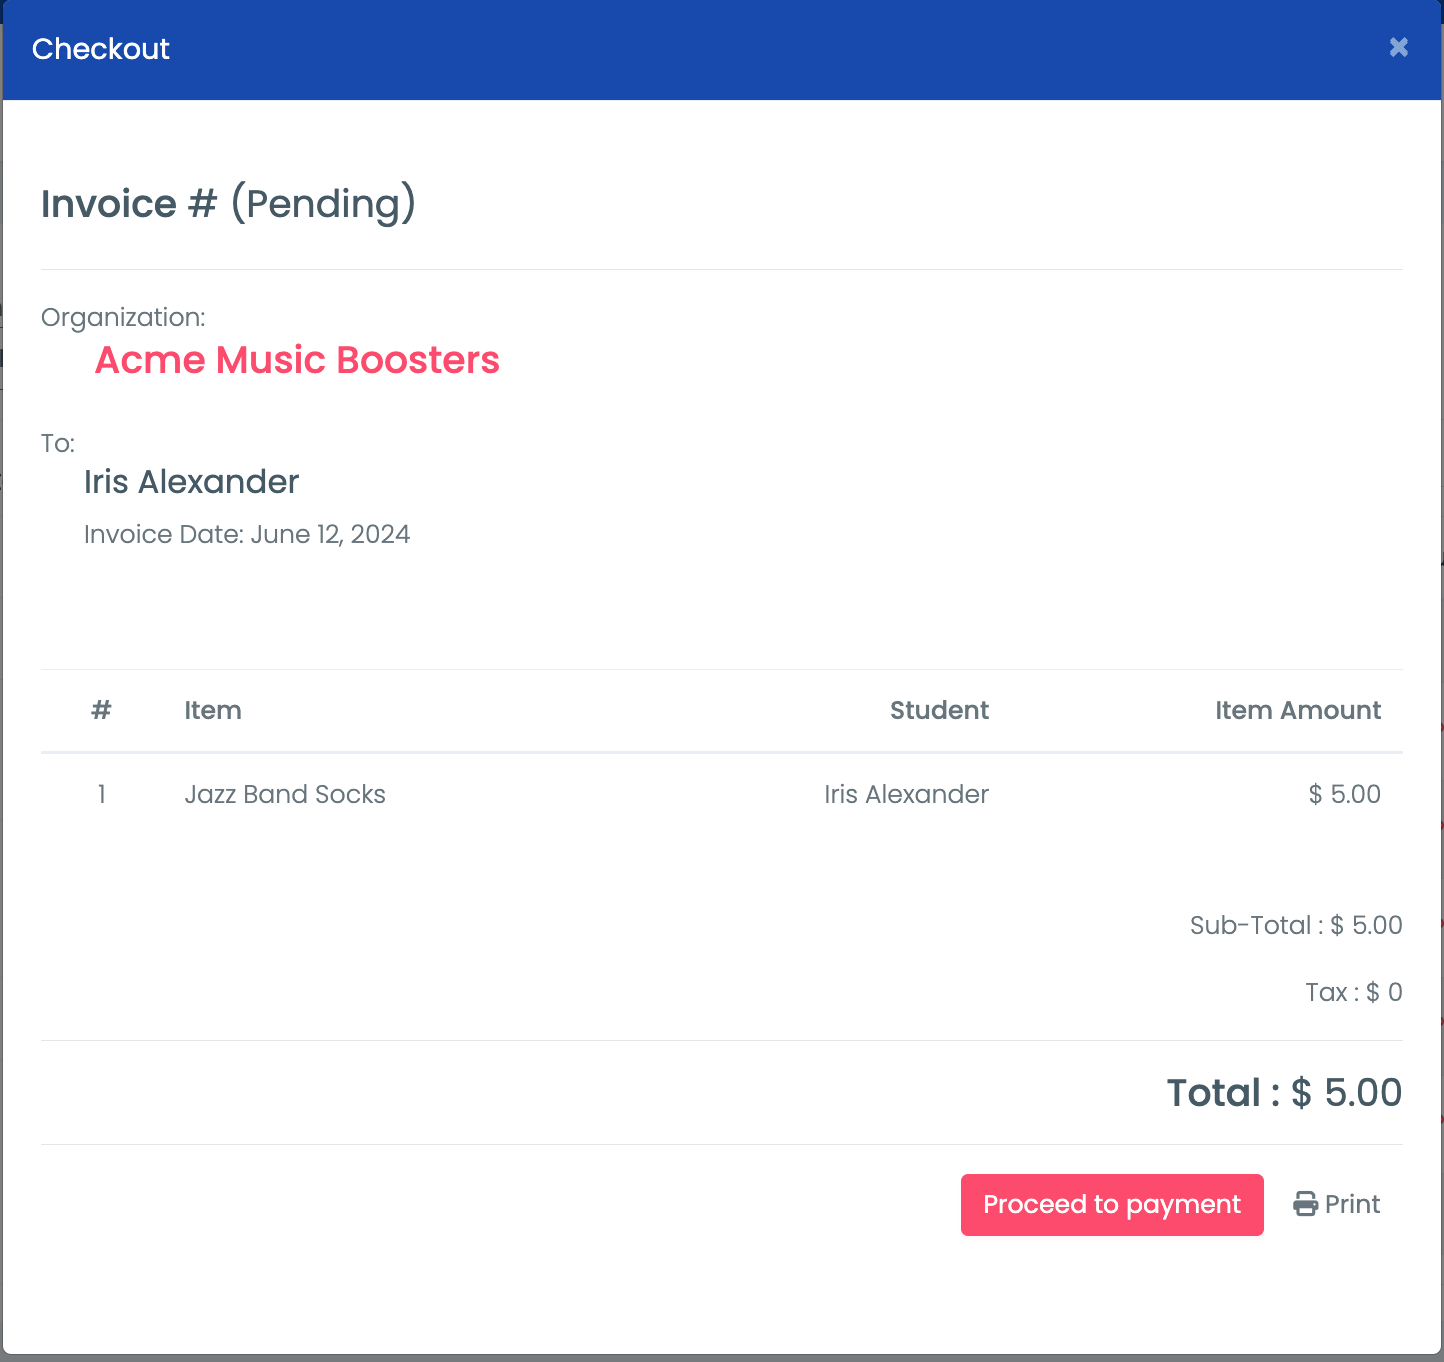
- When you select fees from the Fees tab, a yellow cart icon populates in the right corner of the Account Statement. Click on this icon to generate an invoice for the selected amounts (Image 2).
- You can accept Cash and Check payments by selecting the Proceed to Payment button.
- If you select the Print button, you can print the invoice or save it as a PDF.
Emailing Statements
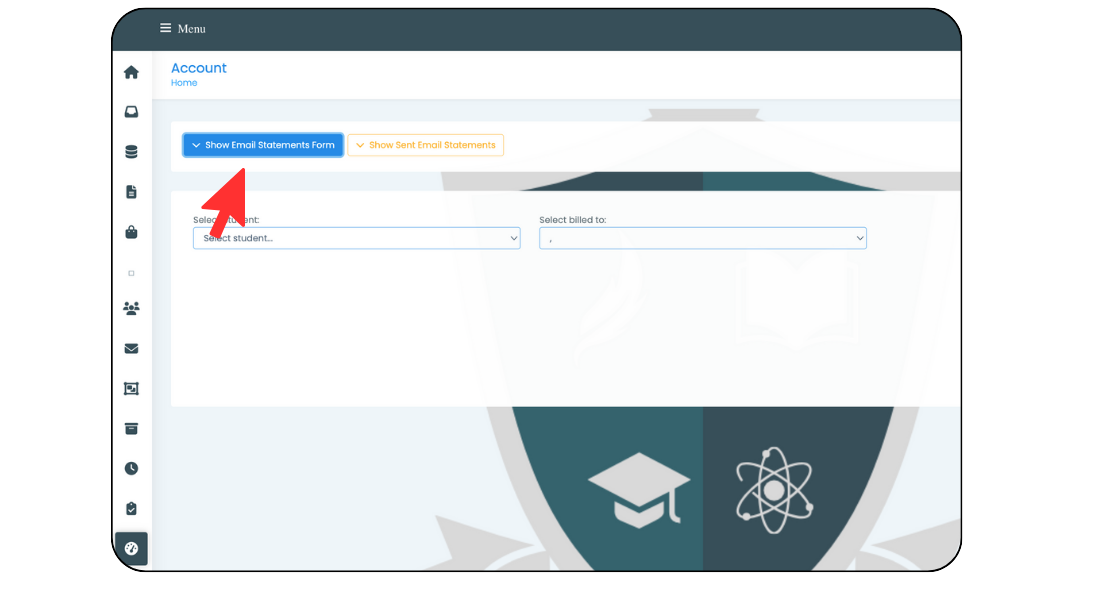
- Left Sidebar > Financials > Statements
- Select the Show Email Statements Form (Image 3).
- Select the appropriate options:
- Include student(s):
- Emails are sent only to connected parent accounts unless
I
nclude student(s)is toggled. - Include paid-in-full statements:
- If 'No', only statements with unpaid/outstanding fees will be emailed.
- If 'Yes', everyone will receive their statement regardless if their statement is paid in full.
- Include paid fees in statement:
- If 'No', only unpaid/outstanding fees will be included in the emailed statement.
- If 'Yes', both paid and unpaid/outstanding fees will be included in the emailed statement. However, statements with NO unpaid/outstanding fees will not be sent.
- Personalize Greeting:
- Using
$firstnametag will display the recipients first name. - Statements are displayed below the personalized message.
- Enter the email subject line and select Send.
Emailing Statements to Individuals
- You can email a statement to an individual from their Student Statement.
- Left Sidebar > Financials > Statements
- Select the student from the dropdown.
- Check the boxes for the fees (paid and unpaid) to include on the statement.
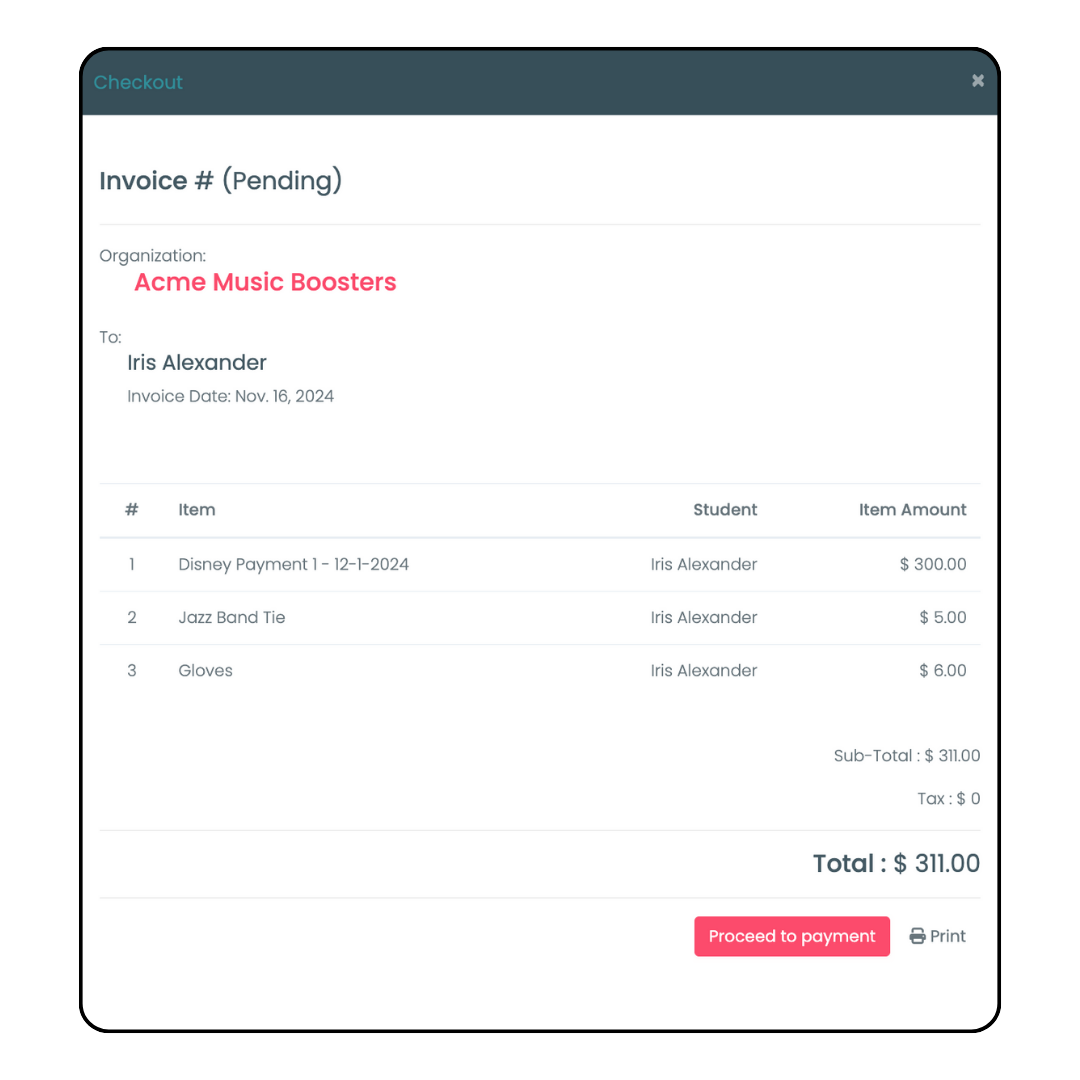
- Click the yellow Cart icon in the top right corner.
- This will generate an invoice (Image 4).
- Click the Print button to print the invoice or save it as a PDF.
New Paragraph
Other articles in this section
New Paragraph
